
The first time I heard someone say there is so much wealth online I was not aware of how true that statement was until Amazon Kindle (KDP) e-book publishing became a reality.
Publishing on amazon can be in two forms, Kindle (KDP) publishing and the normal Amazon book publishing.
Kindle publishing or KDP has been around for a while and not many people know about this amazing and easy-to-do book publishing system where you can publish your content and reach millions of people literally free of cost. This has made so many people around the world wealthy while using little or no hassle.
Some people miss this opportunity because they think that this type of publishing is only meant for writers and professional book authors. This is not true, I was never a professional author or even a writer when I started writing on amazon, but when I followed the same steps and secrets I will share with you in this article, my first book became best-selling after the first two weeks of publication.
This was when I saw the amount of fortune that has been hidden in kindle publishing.
The best part of it is that all you have to do is create the content following the steps I will tell you about in this article and set your preferred price, Amazon will take care of the rest, this includes shipping, billing, returns, delivery etc.
Don’t worry there is always an audience for any type of content you put out there in the world, and amazon knows where to find the people to buy your book but you must set up your account the right way and this is the area we can help you with.
Note: Your contents (ebook or paperback) will continue paying you years after you even stop publishing, believe it or not, it is fact and I am a living testimony to that.
Are you ready for a new passive income that you can do right from the comfort of your home and with a computer device free of cost? Then let’s continue.
Steps To Create and Publish Your First eBook On Amazon Kindle Self-Publishing
Step 1: Create an Amazon Kdp Account

Creating an amazon Kdp account is very easy, all you have to do is visit this link kdp.amazon.com, when you get to the landing page as you see in the picture below, click on “Sign up” if you already have an Amazon account, you can use the “Sign In” option instead.
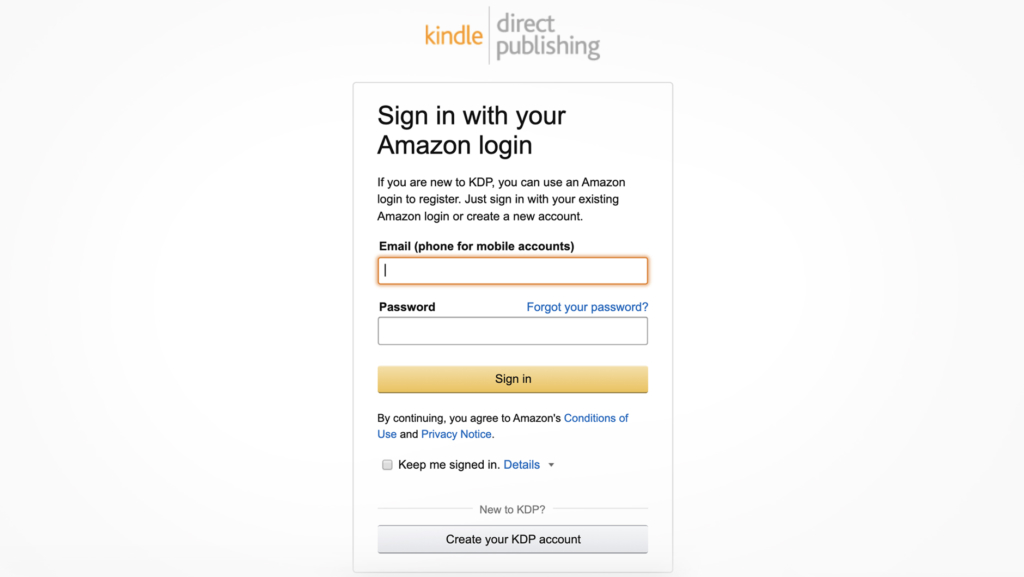
The signup process is that easy, and after signing up newly and agreeing to the KDP terms and conditions, you will be introduced to your new account dashboard.
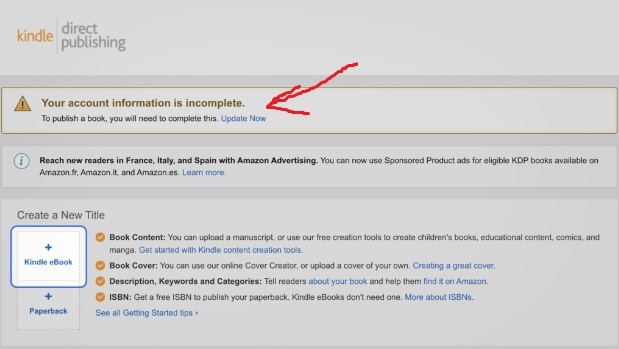
Step 2: Complete Your KDP Profile
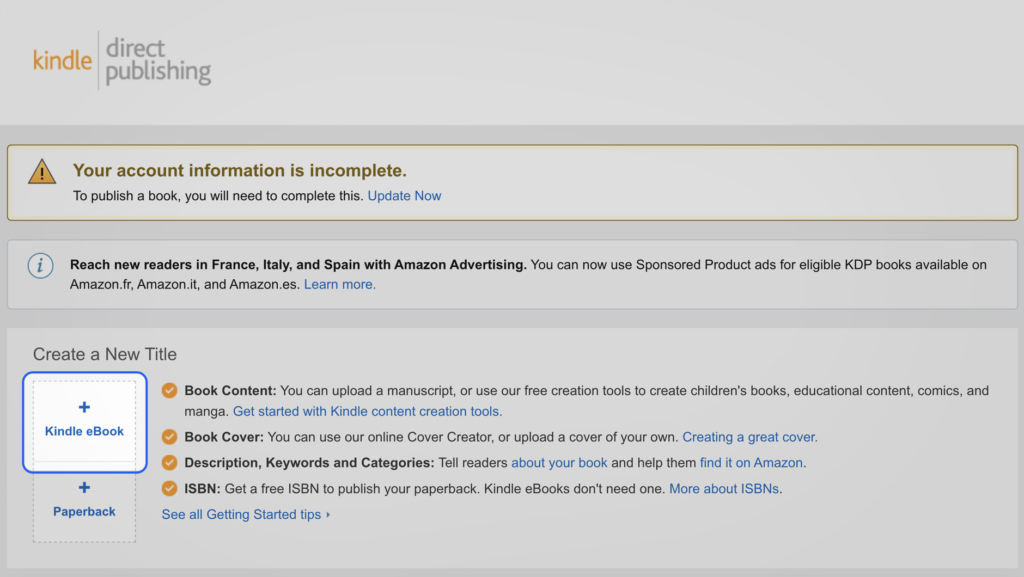
Once you are in the amazon space, you will see an option that says “your account information is incomplete”. You should try to complete your profile information, also, you should ensure to only give information that is required and not what is not required.
Step 3: Create Your First eBook
Now that your kindle account is up and live, it means you are ready to start with the content. You can decide to write your own ideas into a book or you can decide to get a good content that already has a lot of people interested in it, for example, a large number of youtube views, or millions of likes engagement and comments.
Note: A simple 20-25 page book that teaches how to do anything can be worth $3 dollars and bought by over 3,000 persons, and that is a total of $9,000, this is for beginners.
Now imagine doing this for up to twenty books.
The step of creating your ebook on amazon are as follows:
Choose A Content To Write About
The first thing is to choose content to write about, this can be very difficult but don’t worry, that is why I am writing this article to hold you by the hand as you walk through this path.
Here are some ideas you can start from
- Transcribe Youtube videos about topics that can solve a problem (my favourite and easy to start with)
- Write about your own idea “how to solve a problem” that affects millions of people (make sure you verify that it affects millions of people through Social engagement, Comments and/or views)
- Write about a trending event or activity (something that affects the US Market mostly), eg, politics/election, Christmas, Sallah, etc.
Now, those are some places you can start with as a beginner, I always recommend focussing on solving a problem for starters. But feel free to follow your passion, just make sure it affects a good amount of people.
Give Your Content A Title
Choose a good title for your content, do not choose a title that you want, instead, choose one that appeals to your audience and can draw their attention.
Note: The secrete is to make sure your title contains a “promise to solve a problem”, eg, How To Trade BTC Instantly.
Using the example listed above, the term “Instantly” is the “promise word” and that is your money word. With “promise” words you stand a better chance for people to want to hear what you have to say.
Record Down Keywords From Search And Rewrite Your Title with The Keywords
You should do title research on your topic to see what other people are naming their content on the same topic. You can see this by searching the term on the Amazon marketplace.
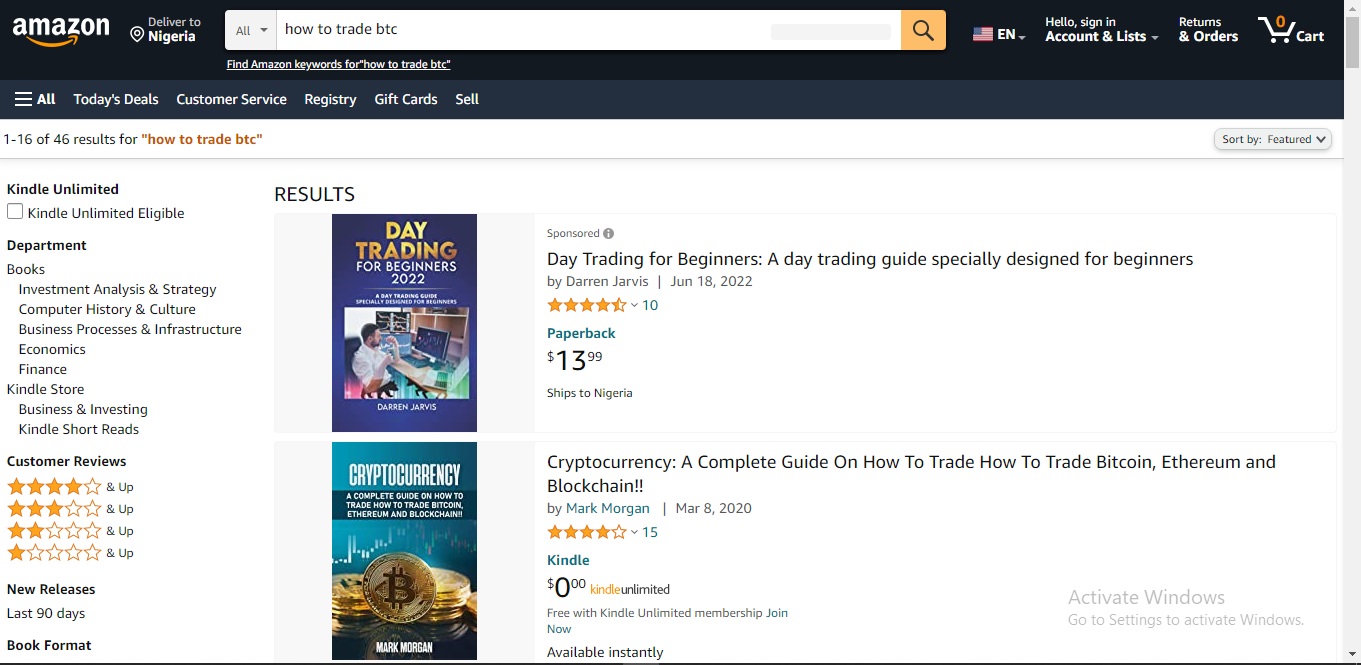
The search result displayed in the search can give you a guide on what Keywords are important to add in your title.
When you see the keywords that people are constantly adding to their content, also do well to include them in your own title so that you reach the same audience.
Use This Font Sizes
For your Title, you should use 36 pixels, and for your headings use 26 pixels, and finally, for your body or content paragraph use 20 pixels.
You can not use just any font size in your work as it is very important that you stay within the amazon KDP font size specification.
Content Arrangement
For beginners and for those that have not written any kind of content before, this is how you can arrange your content.
* Write Introduction: Write an introduction of the content that you are about to start, just a brief about what your book will be discussing.
This is the most important page of your book, this is where people read and then decided to buy or not, so take your time to mention the problem you want to solve and state your promise.
Although this is the first page of your book, you can leave it blank and come back after you are done writing the book.
* Write Your Table Of Content: Remember to use the font size of 26 pixels for the title and 20 for the body as you list down your table of content.
* Start Writing Your Book Content It Self
Write the main content of your book page by page, chapter by chapter. Regardless of if you are writing your own content or you are writing someone else content, you should keep in mind that your content will be read and bought by real people. If you follow the steps I outlined from the start you should be fine.
* Write Your Conclusion
This is probably the last writing in your ebook unless you kept the introduction page blank. Either way, make sure you write a conclusion stating a summary of the whole book.
Proofread, Number and Format Your Content
Now that you are done writing your book, you are ready to proofread and format your content. Formatting your content is as easy as making sure that your content has good page numbering and font sizes.
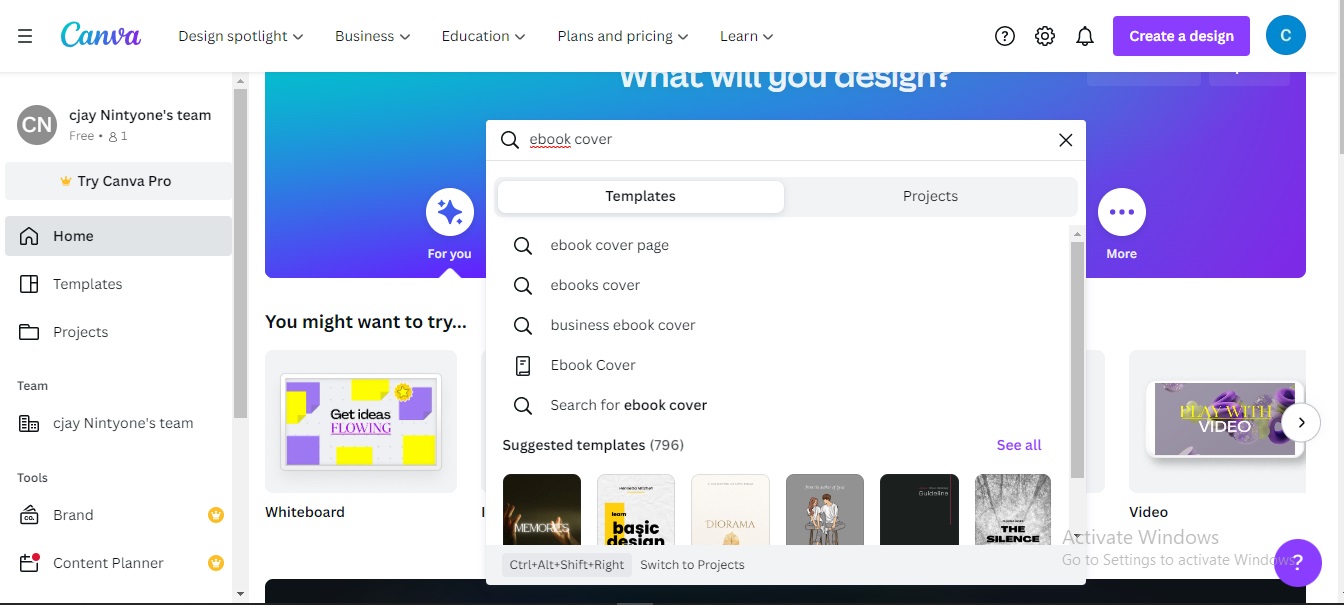
Create A Book Cover
You can get a graphic designer to do this food you, or you can reach out to us to show you how to use canva.com to design your own book cover the way you want.
Simply go to Canva.com, sign in with your Google account and go to the canva.com search bar. Use the search to check the ebook cover and edit what you get into anything you want.
Upload Your Content
Now that you are done with the content creation process, you are ready to upload your content, so simply go back to your kdp dashboard you will see two options Kindle ebook and paperback click the ebook option to start with the upload option.
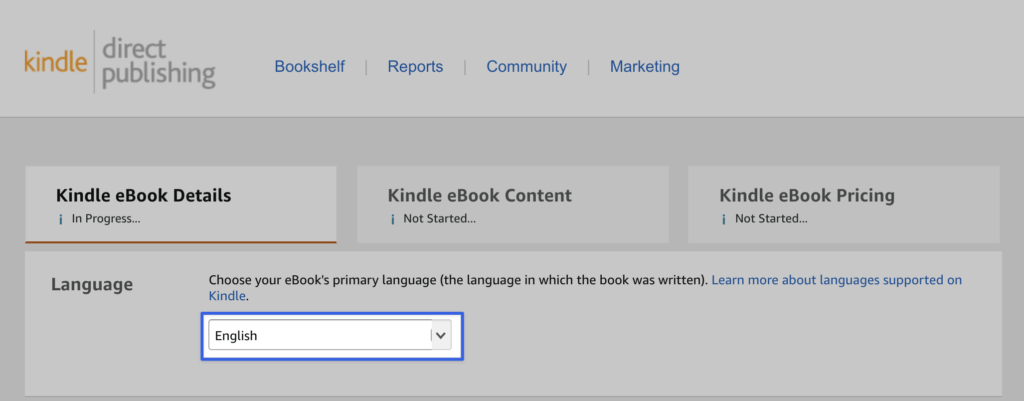
Step 4: Set Primary Language
You will need to choose a preferred primary language for your new ebook, this helps the KDP.
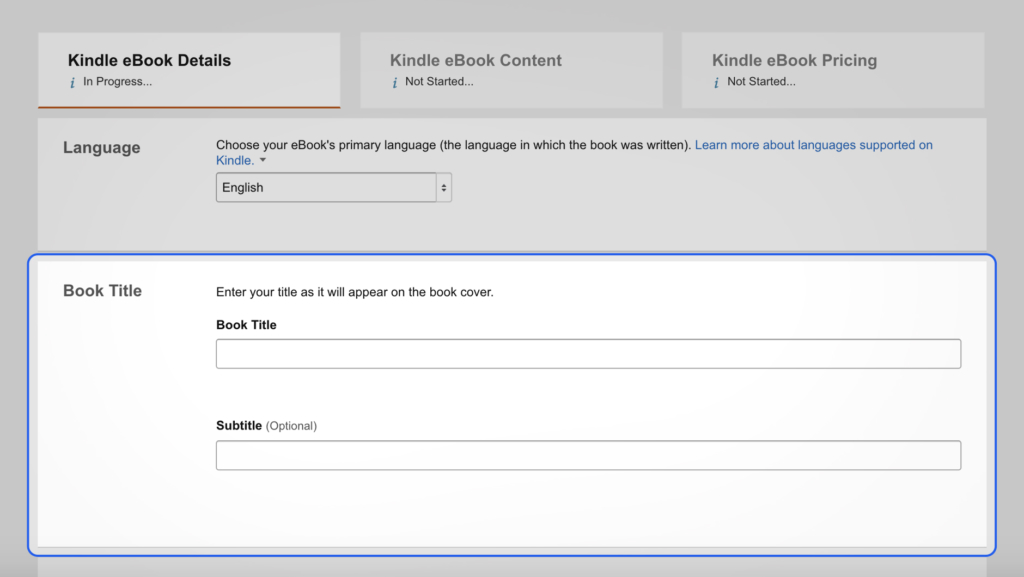
Step 5: Set The Title of Your New ebook
This is the make-it-or-break-it point because people will instantly know if they want your book or not as soon as they see what your title is about.
So please take time to implement what I told you about doing title research first, to see what people are using for their title, and try to include a promise if possible.
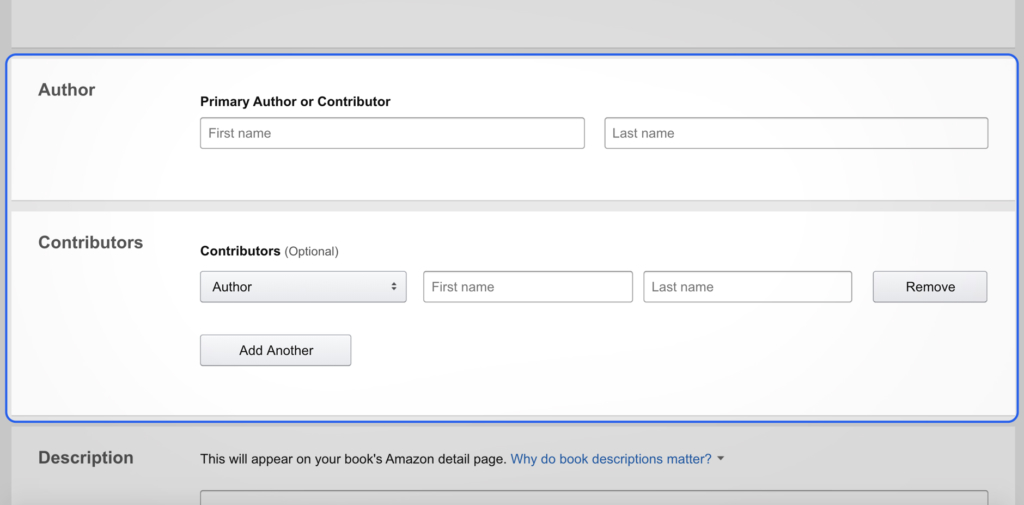
Step 6: Set The Title of Your New ebook
Add the Author’s name, in this case, you might want to use a pen name, if you are writing content specifically for the USA market, or you can use your own English name just to keep it easily relatable.
The contributor’s name is optional so you can actually not write anything on it.
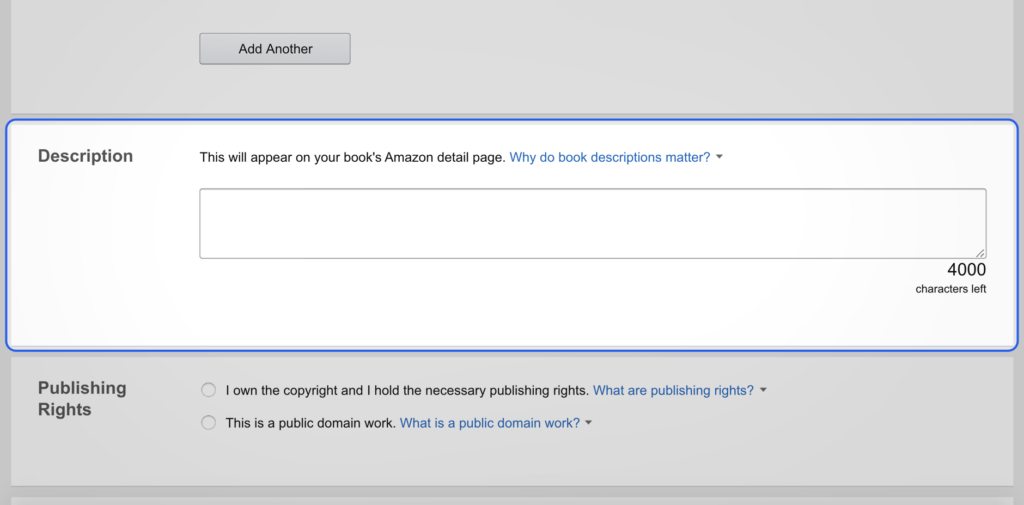
Step 7: Set Your Book Description
Book description is as important as book title, 90 per cent of people will read your title, 60 per cent will actually read your description and that is when they know if they should buy your book or not.
Note: Check top sellers in your niche and see how they create their descriptions and model yours please do not copy their descriptions.
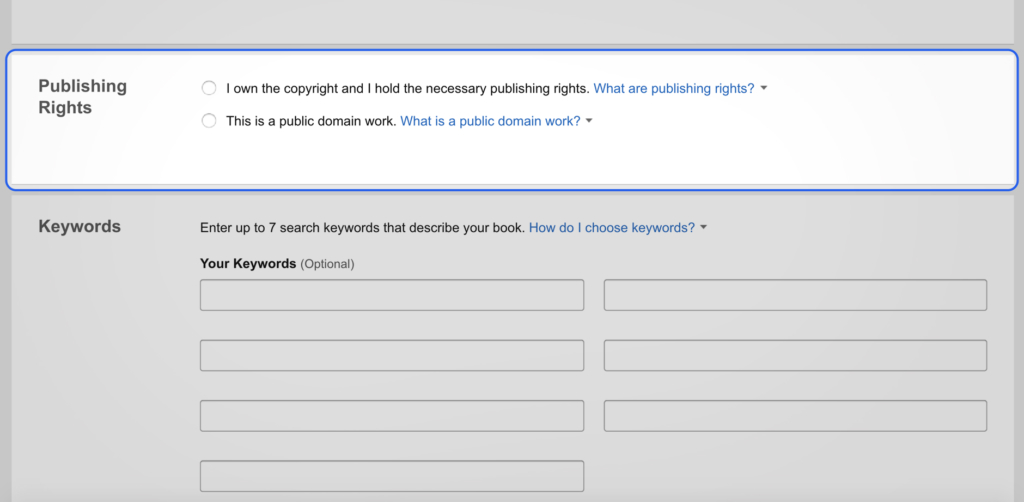
Step 8: Choose What Publishing Right You Want
Since the content is yours and has not been written by anyone else, you should choose “I own the copyright”.
Step 9: Set Your Keywords
Keywords are very important, this is how the KDP system knows who to show your book to, depending on the keyword you wrote, also you have the option of viewing what keywords your top selling competitors used in their own book and add them to your own keywords.

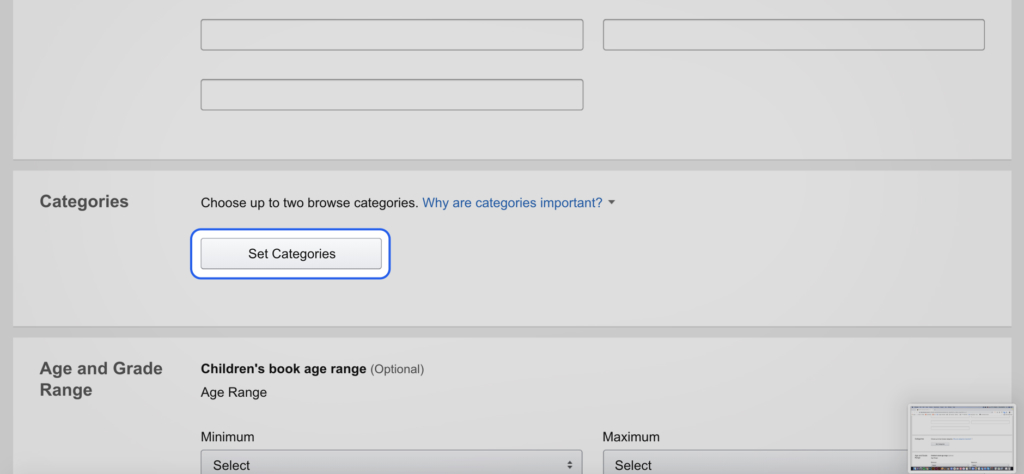
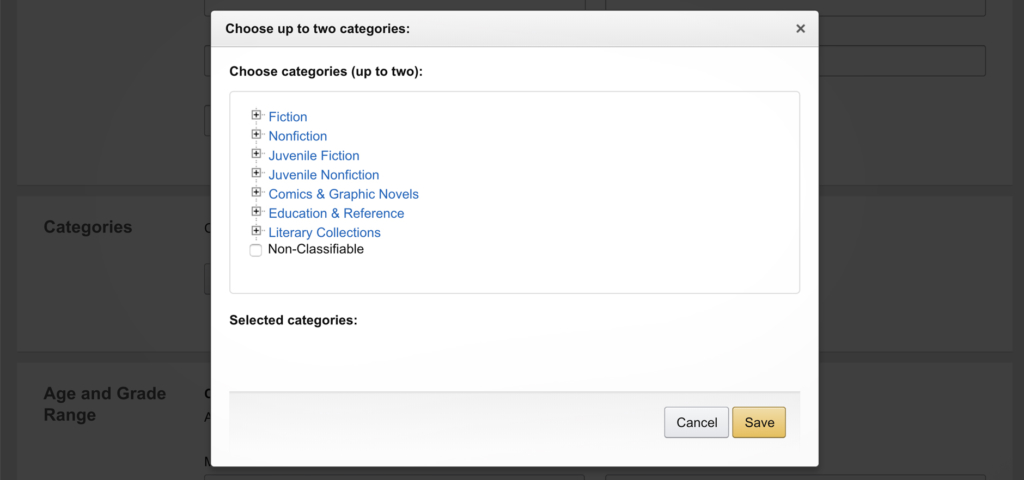
Step 10: Set Your ebook Category
Set a category that you want your ebook to fall under. You will be presented with a couple of Parent categories and sub-categories depending on what you. Choose the one that best suits your book.
Step 11: Set Age Range For Your ebook
This is very important because if your book is for kids, you want to make sure that you set the age range for kids so that parents looking for kids’ books can see your book.
If your book is for adults, please specify.
Make sure you choose a range for your book as it will help Kindle know where to sell your content.
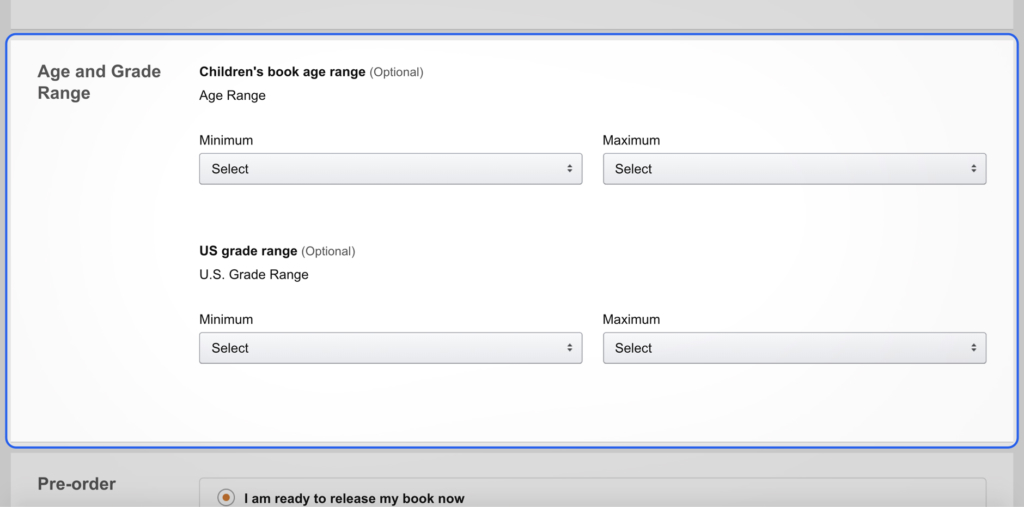
Do not bother setting the USA age range if you don’t want to, it is optional.
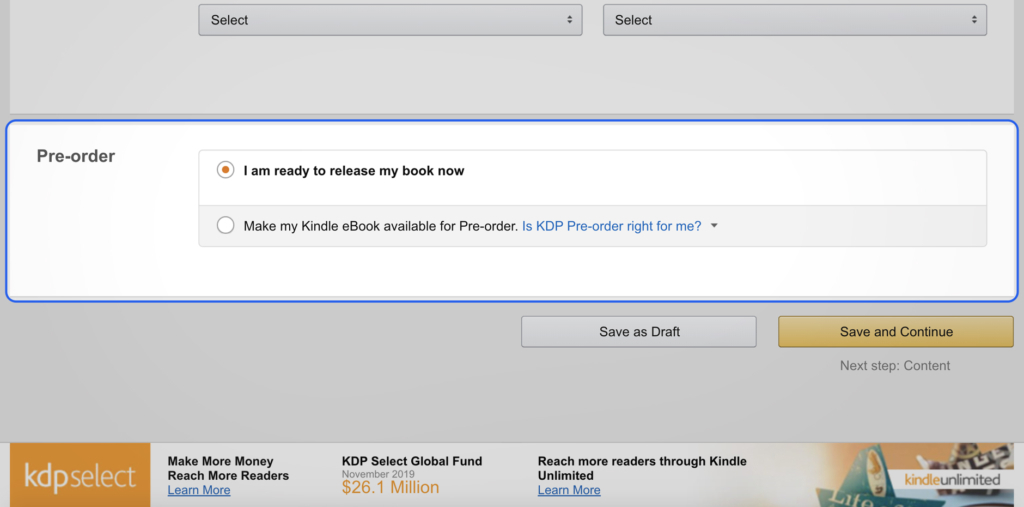
Step 12: Set When You Want your ebook Released
You should set your book to be released immediately if you know you are ready to launch your book, “Choose “I am ready to release my book now”.
You also have the option to set a release date if that is what you are interested in, to choose the option of setting a release date for your ebook please select “make my ebook available for pre-order”.
You might not be needing this second option for now as you are a beginner, but for a more advanced sale option, we will help you learn how to make pre-sales possible for an advanced marketing option.
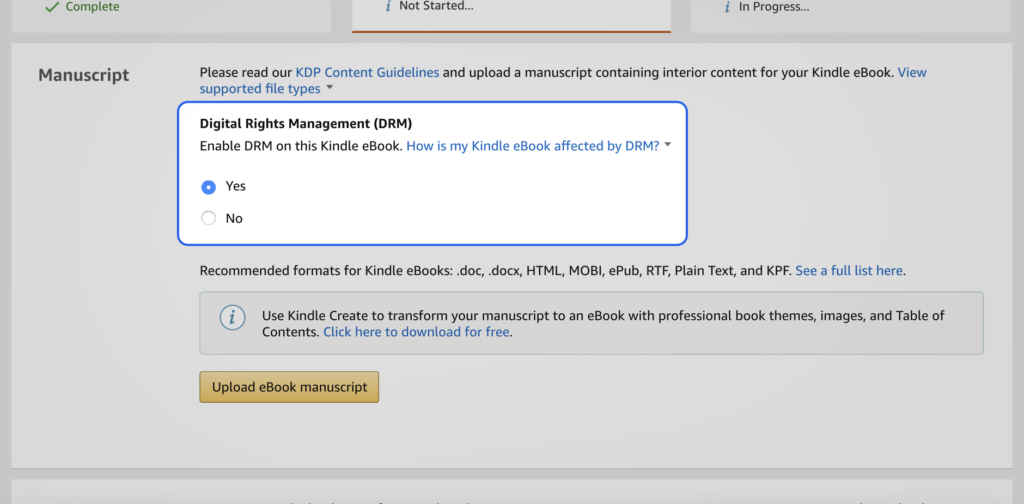
Step 13: Enable Digital Rights Management
Please enable DRM so that people will not copy your book and give it to other people for free. This right protects your book from being accessed for free.
Please note: This is not changeable once you publish your book.
Step 14: Upload Your Manuscript
Now you are ready to upload your manuscript and be sure you have formatted it properly and well arranged.
Kindle usually prefers .epub or pdf file type, although there will be other file types like doc and docx, I will advice you to go with epub or pdf format.

Step 15: Upload Your Manuscript
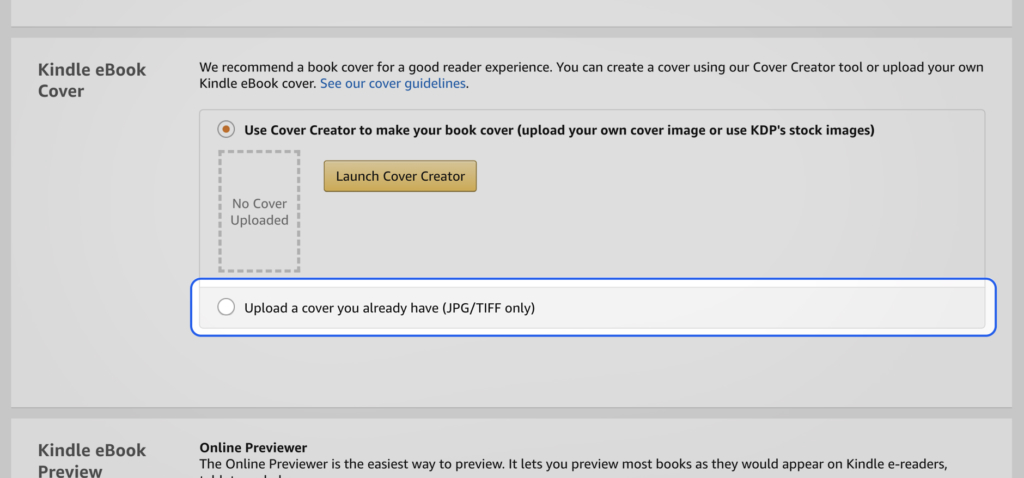
If you already have a designed book cover you can upload it here, or you can get one done using Canva
Note: Your design should be simple and catchy, people take your work seriously after they see your cover design.
Step 16: Preview Your Work

As soon as the cover upload is completed, kindle give you the chance to preview what you have written, this is so that you can see how your work appears to people that will be interested.
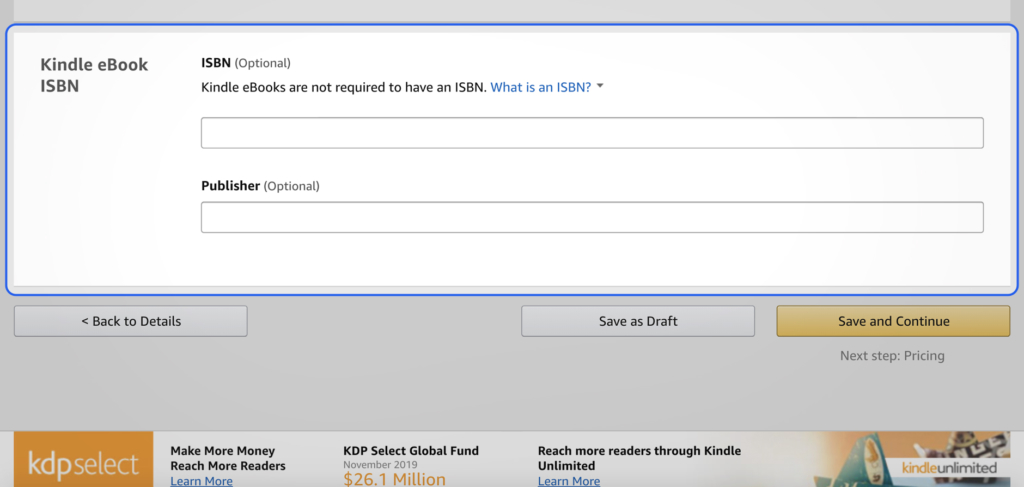
Step 17: ISBN Number and Publisher
Both of these options are optional and you should leave them blank if you intend to only sell on the KDP marketplace, keep in mind that as a beginner you will not have a need for this for now.
Step 18: KDP Select Enrollment
This is a good option, but you can also do it at a later time, the kindle enrollment program allows you to give kindle access to maximize sales by selling your books in different versions and using options like count-down deals to show your book to more people. Also, this means you can sell your book outside amazon kindle for 3 months.
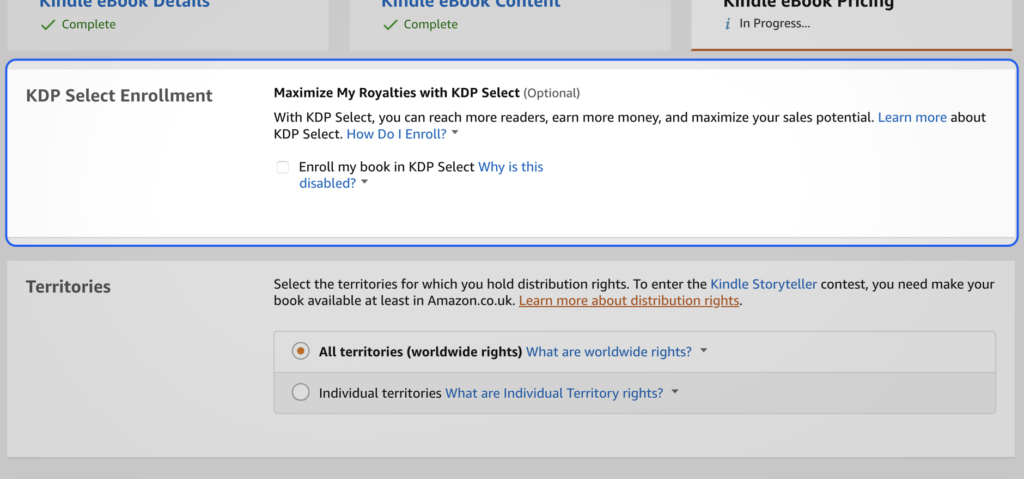
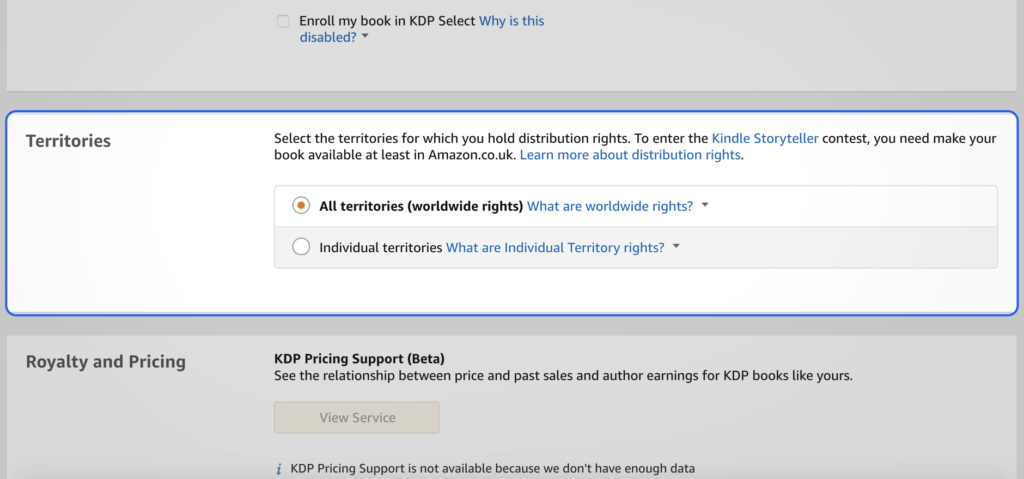
Step 19: Choose The Country/Territory You Want To Sell To
You can sell to individual countries but I recommend that beginners should set this option to worldwide until they have a reason to specify countries. Individual countries will reduce sales.
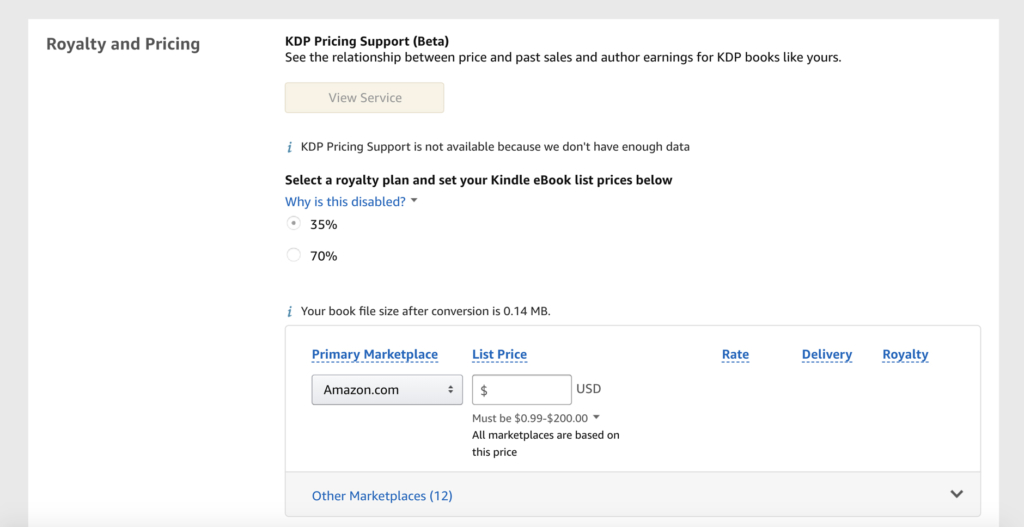
Step 19: Select A Pricing System You Want
Here you choose how much percentage of Royalty (cash earned) you want, you have the option of choosing if you want 35% or 70% royalty, for beginners, the more royalty the better, but you should know that choosing 70% royalty can have its limitation in terms territories where your book is sold. Not all territories are available in the 70% royalty plan, your book will still be sold there but at 35% even though you choose 70%. Please read the royalty calculation.
Note: If you choose the “public domain work” option in the “Publishing Rights” then you will not be eligible for the 70% royalty plan.
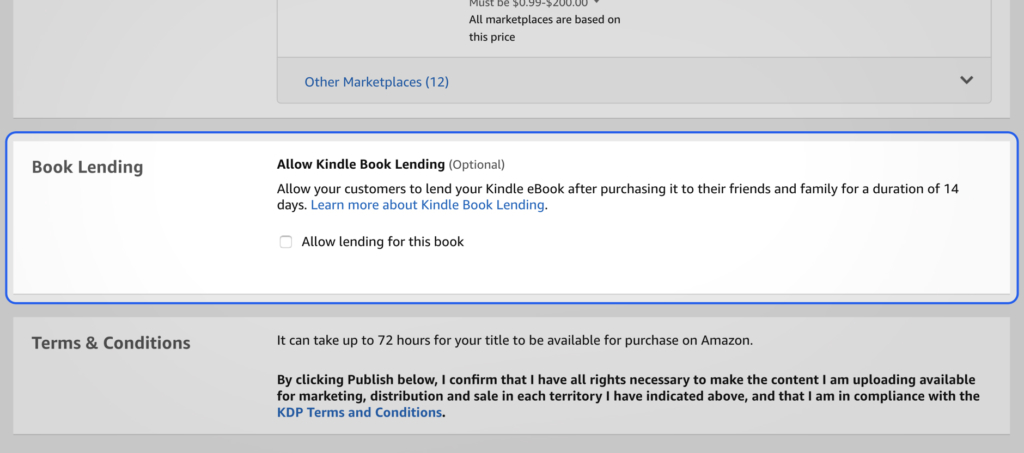
Step 19: Book Lending Option
This book lending option gives your buyers the right to lend your book to friends and family for 14 days and also this option always comes with the 70% royalty plan.
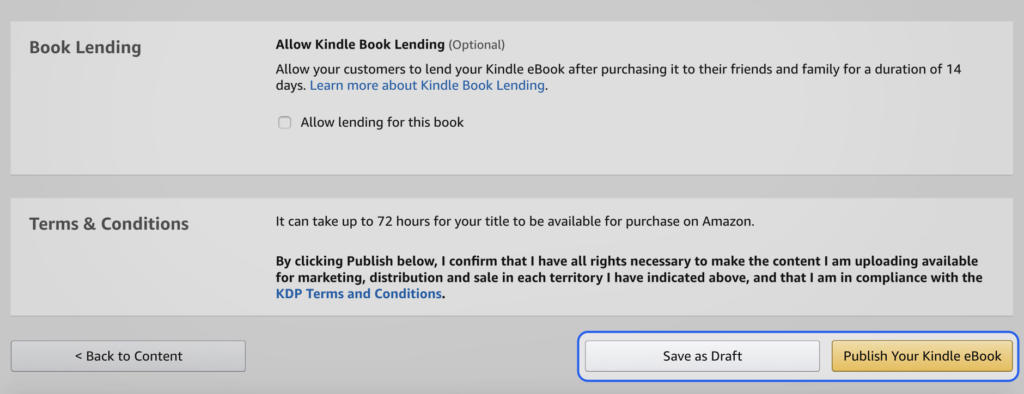
Step 19: PUblish Or Draft
At this point, you are ready to publish your book, but if you think you need more time, you keep the book in the draft and come back later to review all your settings and publish.
After publishing your book can take 4 to 5 hours to be live to you and some territories, and will take 24 – 48 hours to be available worldwide.
Conclusion on Amazon Kindle Self-Publishing
This is a good option for beginners to start and it is quite easy as you don’t have to deal with most of the leg work after you have the right settings as specified in this article. Feel free to contact us to help through any of these steps, you can enrol in our KDP masterclass where we teach the secret boost sales and earning 500% of what your book is worth.
We have helped a lot of students start up their self-publishing journey. Even if you don’t know how to put a book together, we can help you do it easily and efficiently while you grow into a master of the art. Contact us today.